How Do I Deploy a Contract In Order To Mint KIP-7 Token? (KIP-7 API)
Hello. This is Klaytn API Service team.
Please refer to the following information about deploying a KIP-7 contract.
There are two ways to deploy a contract; First, deploying it on the Console website. Second, deploying it by making a KIP-7 API call. Please refer to the instruction below for deploying a contract on the Console page, which refers to our first option.
[For Deploying a Contract On a Free Plan]
Before deploying a contract, it is required to set up User Fee payer and receive test KLAY, which is a prerequisite for deploying a contract. For detailed instructions, please refer to the How To Use Klaytn API Service Baobab And How To Receive KLAY For Testing page.
1. To make API calls, set basic Authorization in your preferred tool. Login by using an Access Key ID(Username) and Secret Access Key (Password) that you were given during your Credential process on the Console website.
(Please refer to the Authorization Setup guidelines page about how to create a KAS API Authorization key.)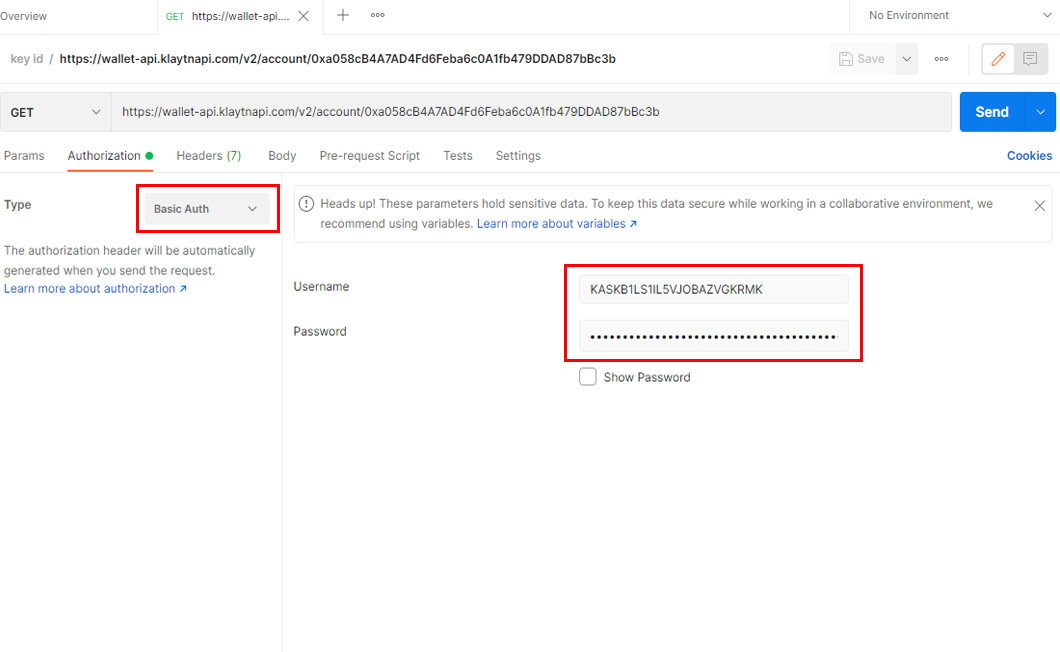
2. Click KAS KIP-7 API Docs. Then click KIP-7 and click Deploy KIP-7 Contract.

3. Copy the URL next to POST and paste it in your preferred tool.
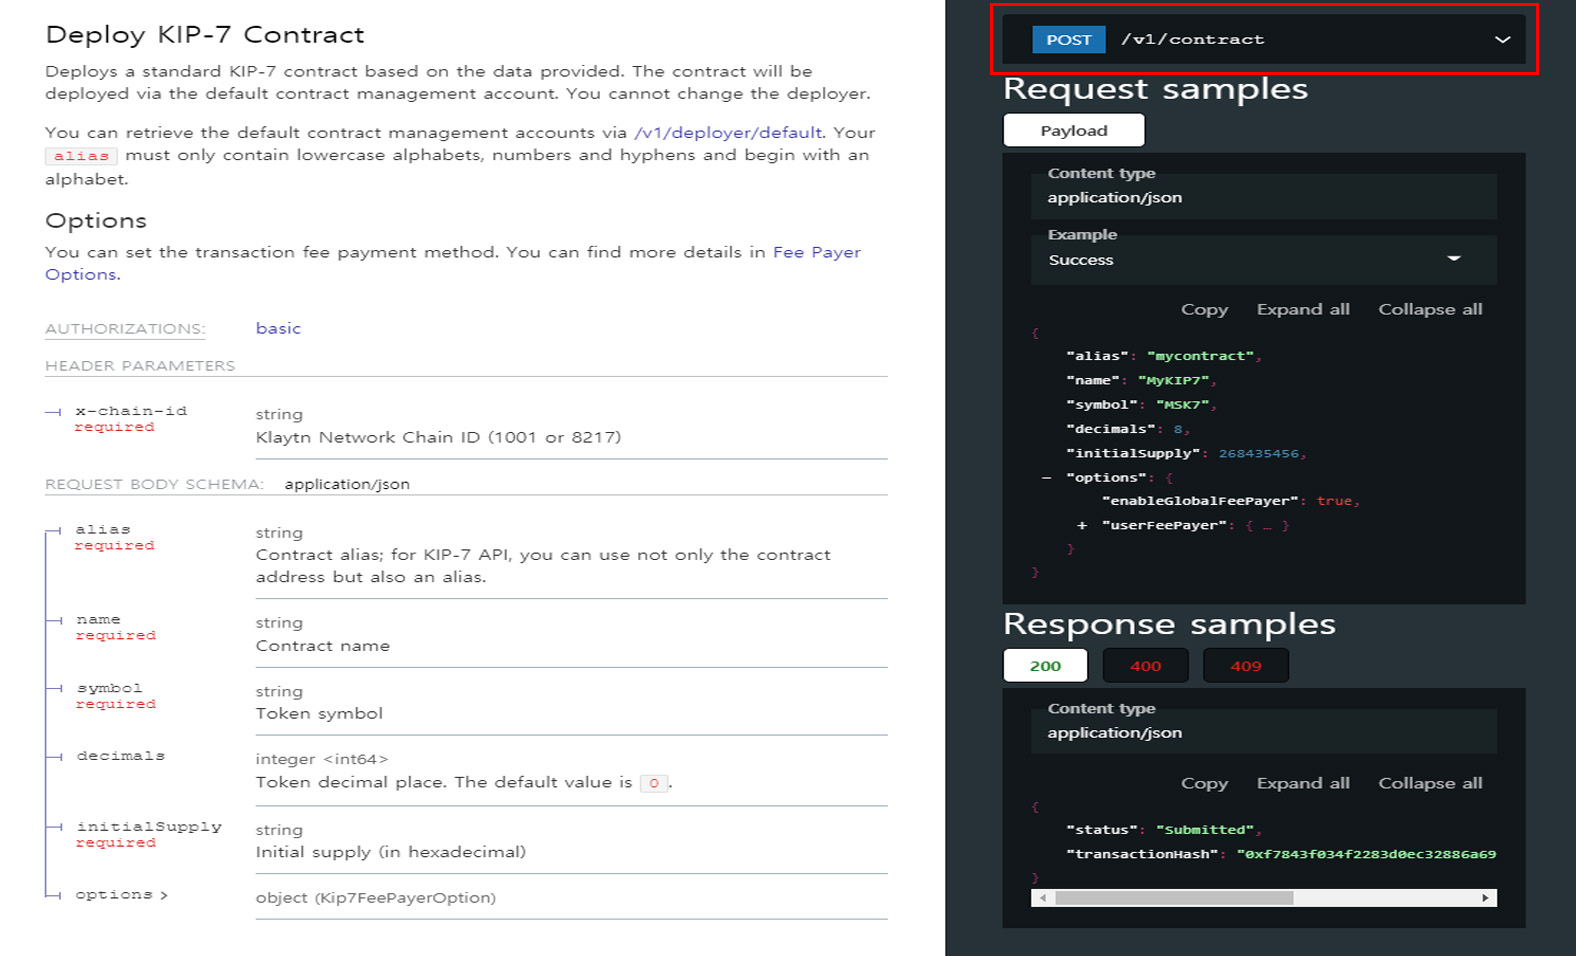
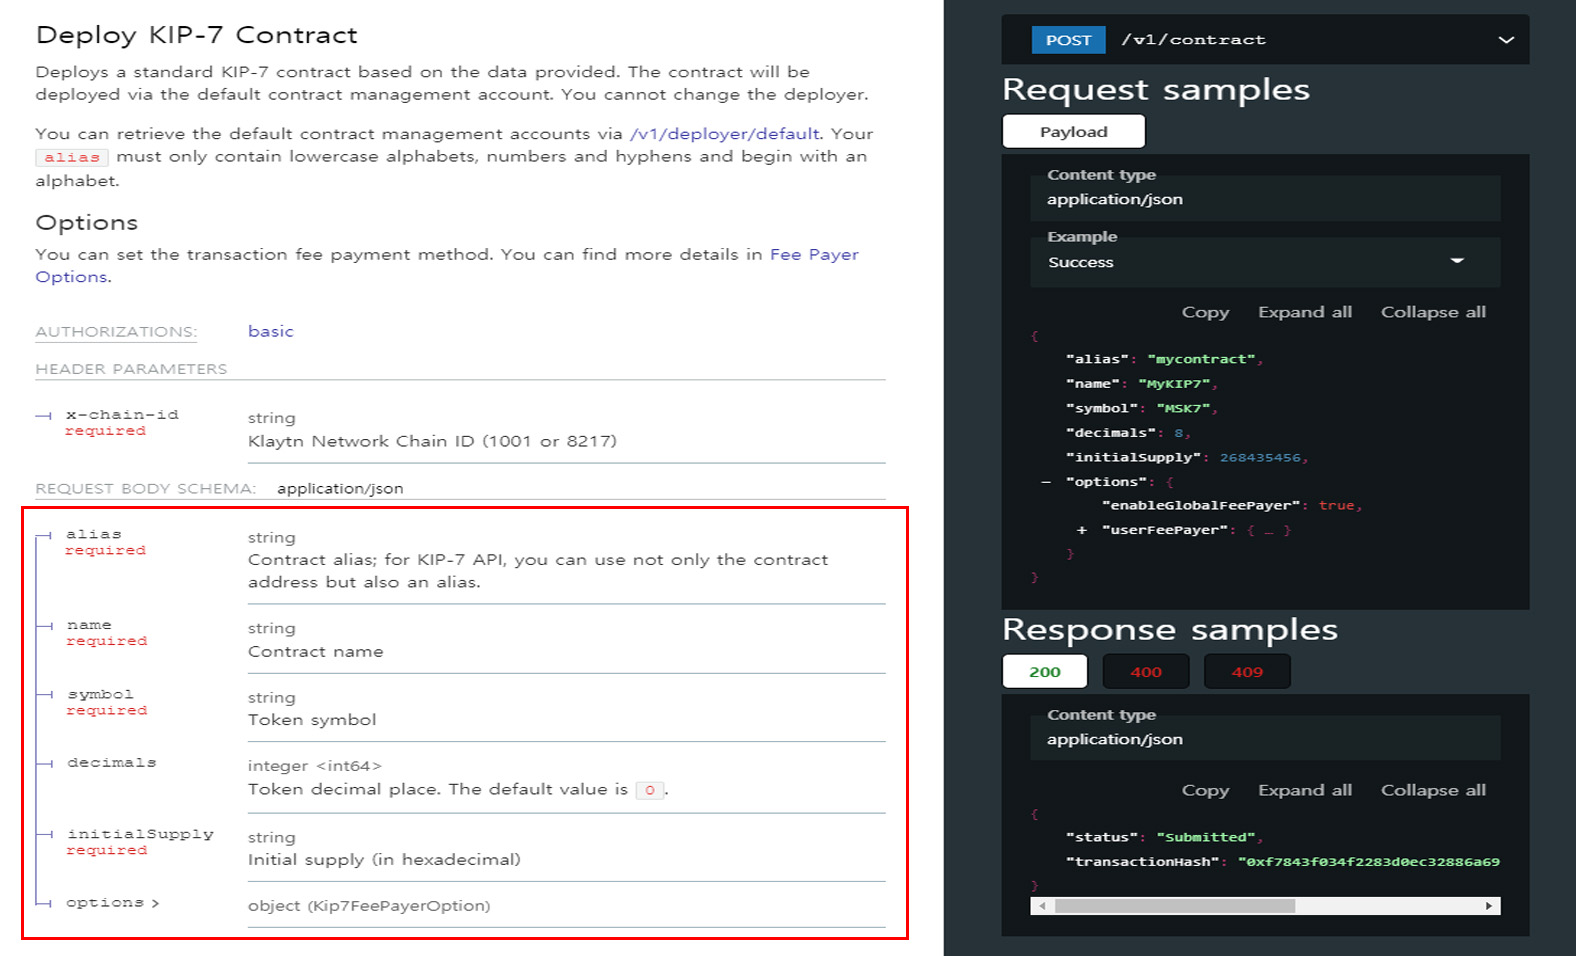
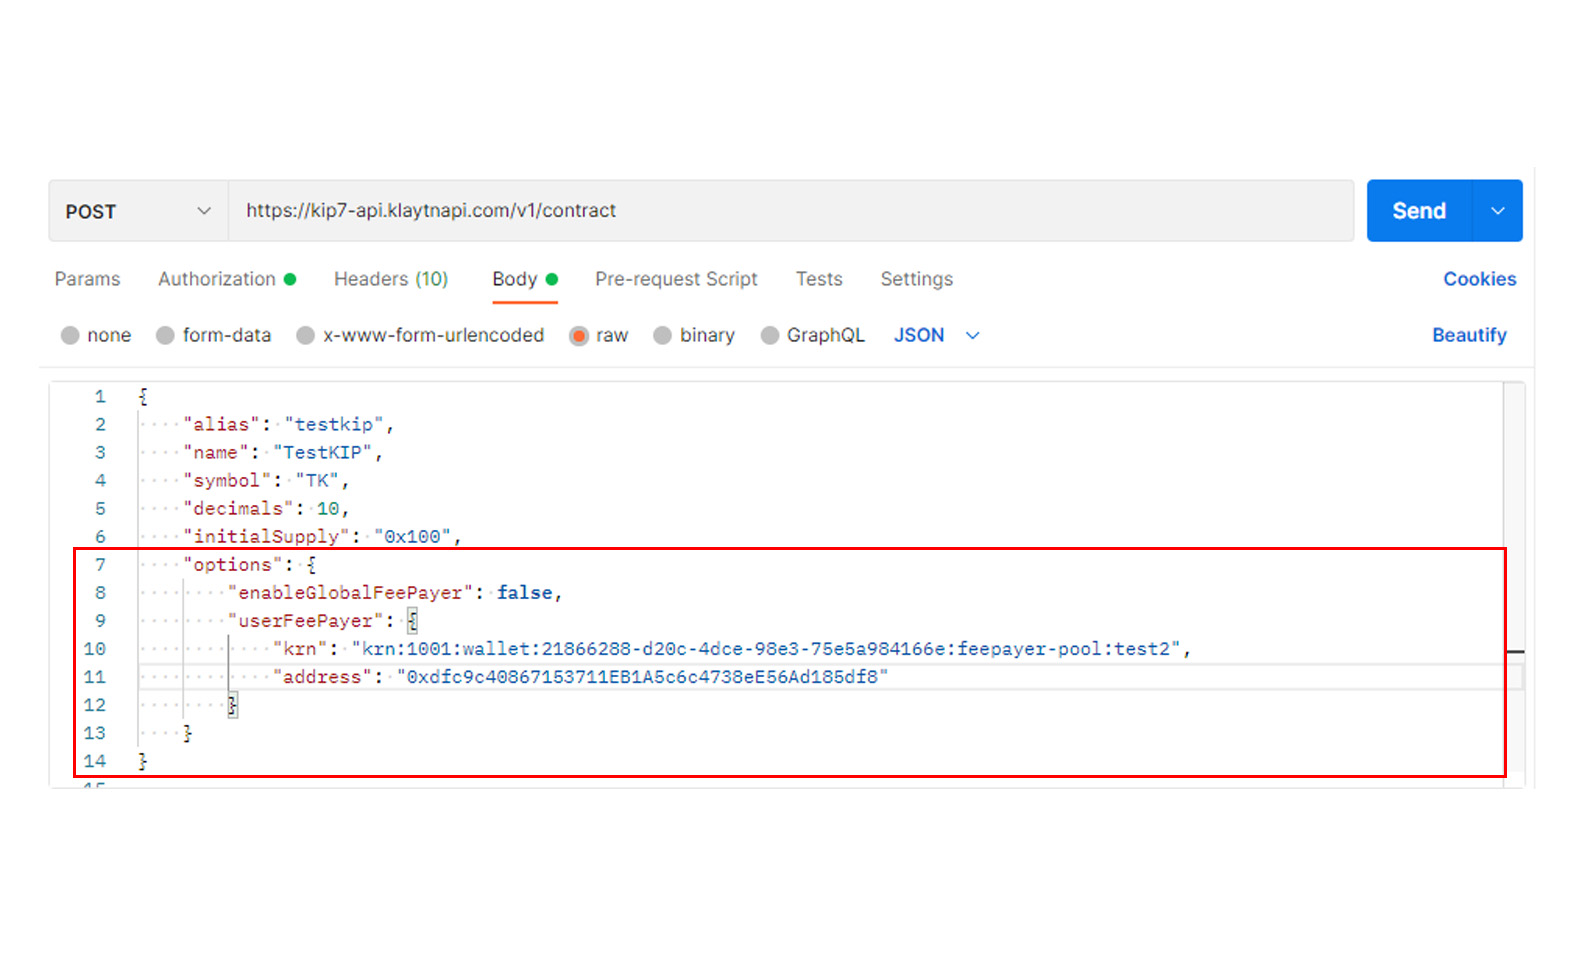
4. In your tool, type a contract alias that can be used instead of a contract address, a contract name, a token symbol, a decimal value which is the number of digits that come after the decimal place, and finally the amount of tokens to create in JSON format.
5. For Fee-payer options, go to Fee Payer Options Docs.
6. Out of the four types of paying transaction fees, refer to the second type. (Please note that Free plan users cannot use the Global Fee Payer service. We ask for your understanding regarding this matter.)
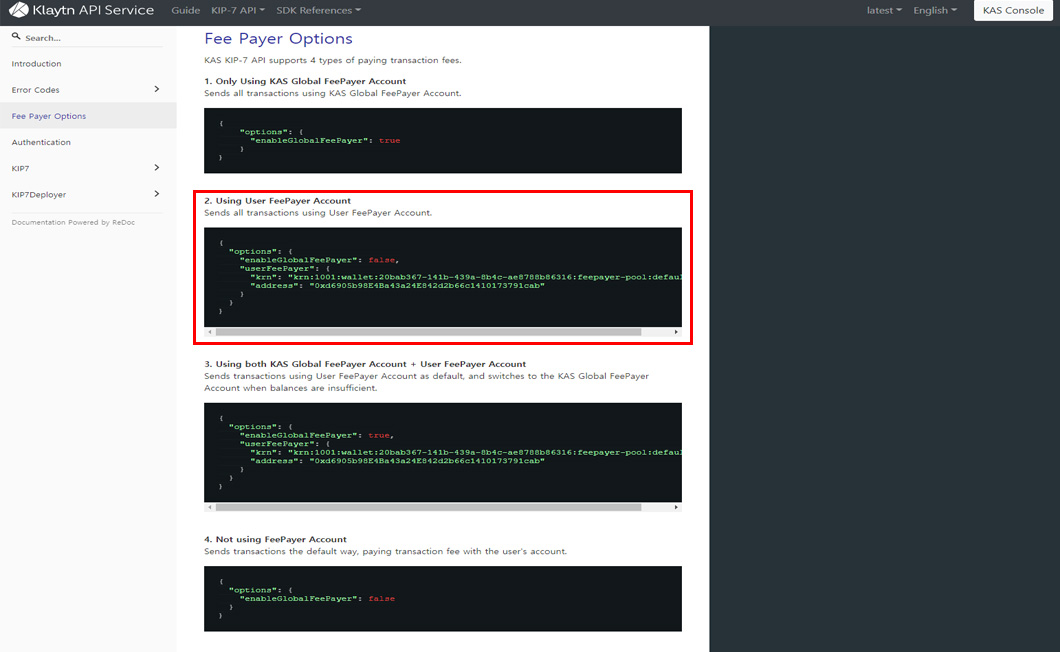
7. To set up User Fee-payer, type the Fee-payer account that received the five test KLAY during a process of the prerequisite and the Fee Payer Pool that has the account.
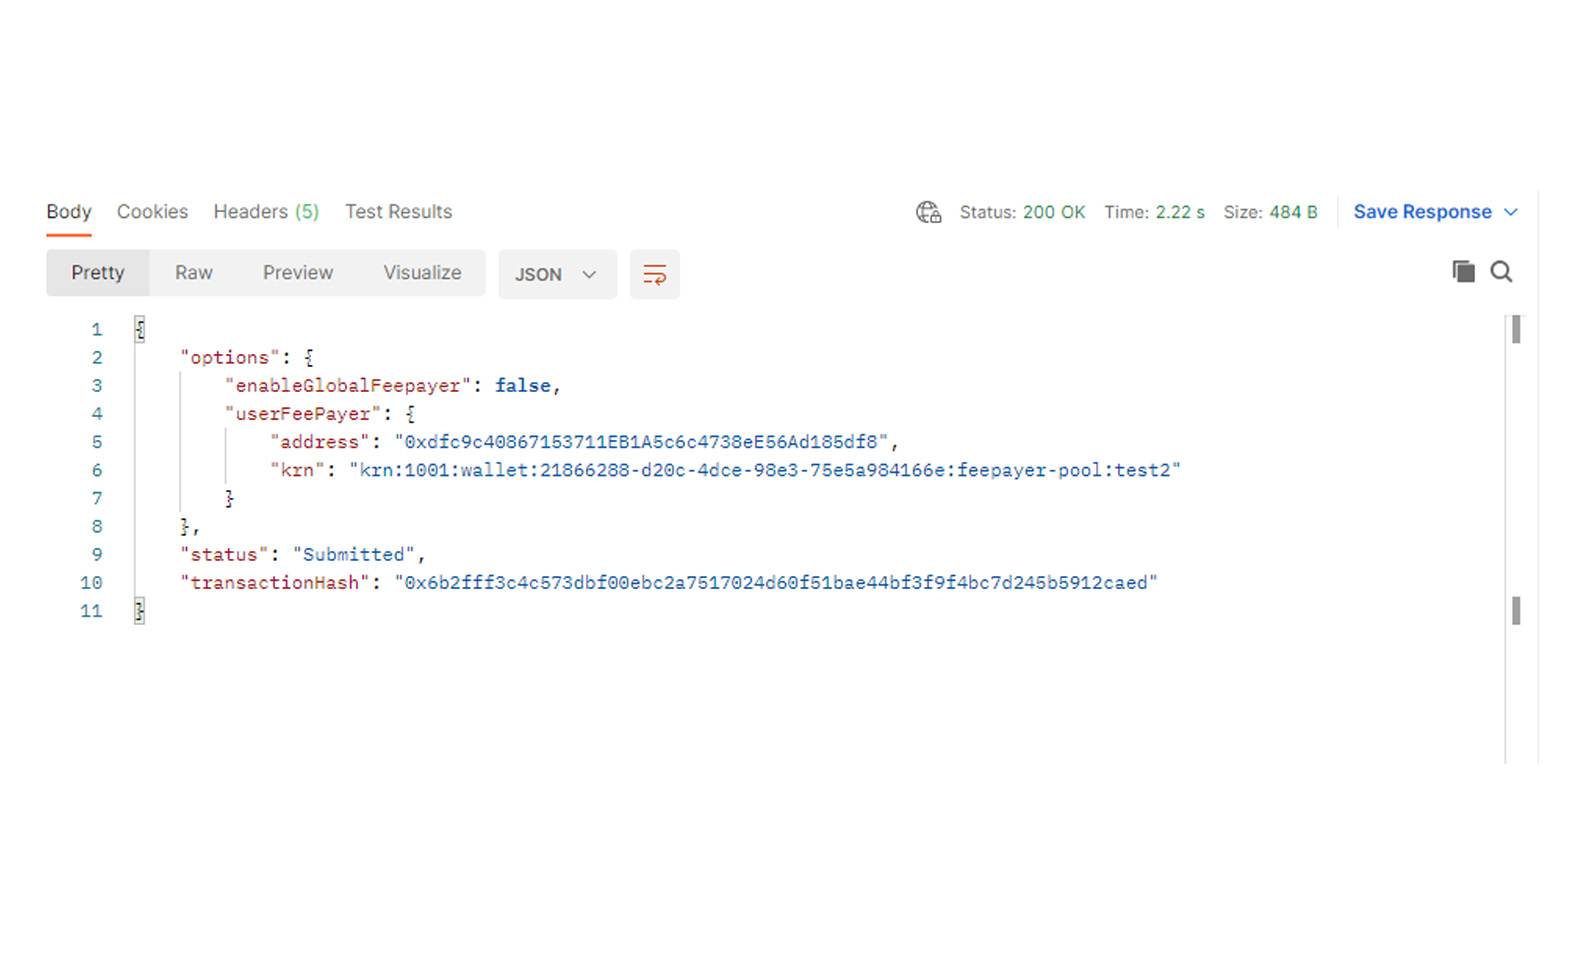
8. You can check the sample responses in the document.

9. After making an API call, you’ll see that your contract is officially deployed.
[For Deploying a Contract On a Paid Plan]
Please follow number 1 to 5 of the instructions on deploying a contract, which is mentioned above and then refer to the instruction below for the next step.
1. Check 4 types of paying transaction fees. Then choose among options 1, 3, or 4.
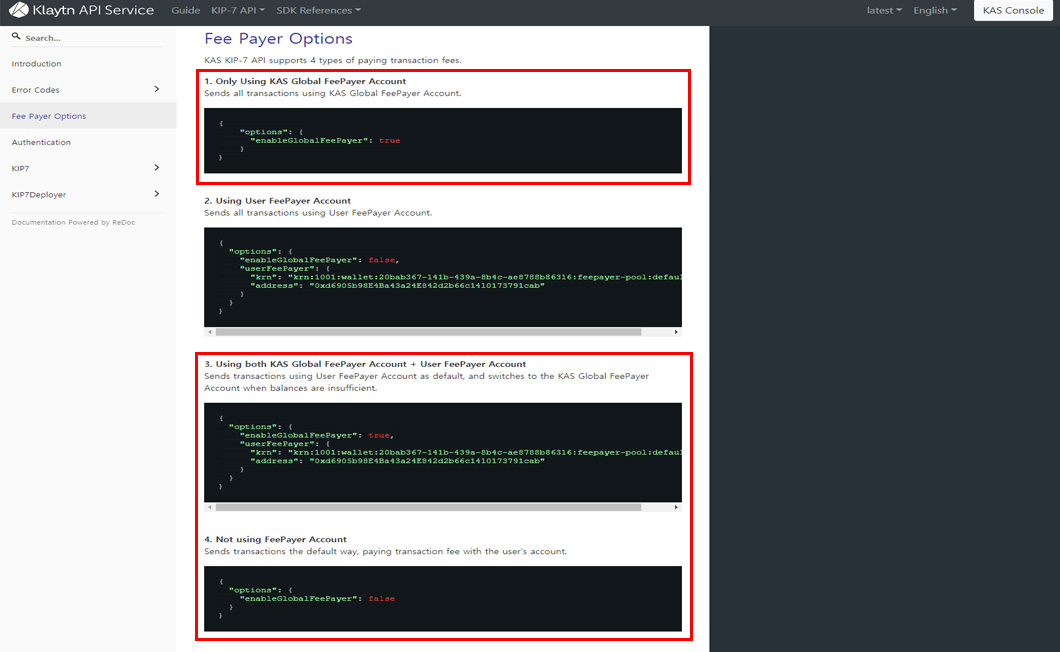
2. Choose your preferred payment option and then input into the tool in JSON format.
(Example of Option 1)

After you complete deploying a contract, a default contract deployer account will be also automatically created.
When issuing tokens after deployment, you’ll create the preferred amount of tokens, which will be automatically transferred to the default contract deployer account.
The default contract deployer account is required in many cases such as delegating token transfer or paying for a contract deployment fee.
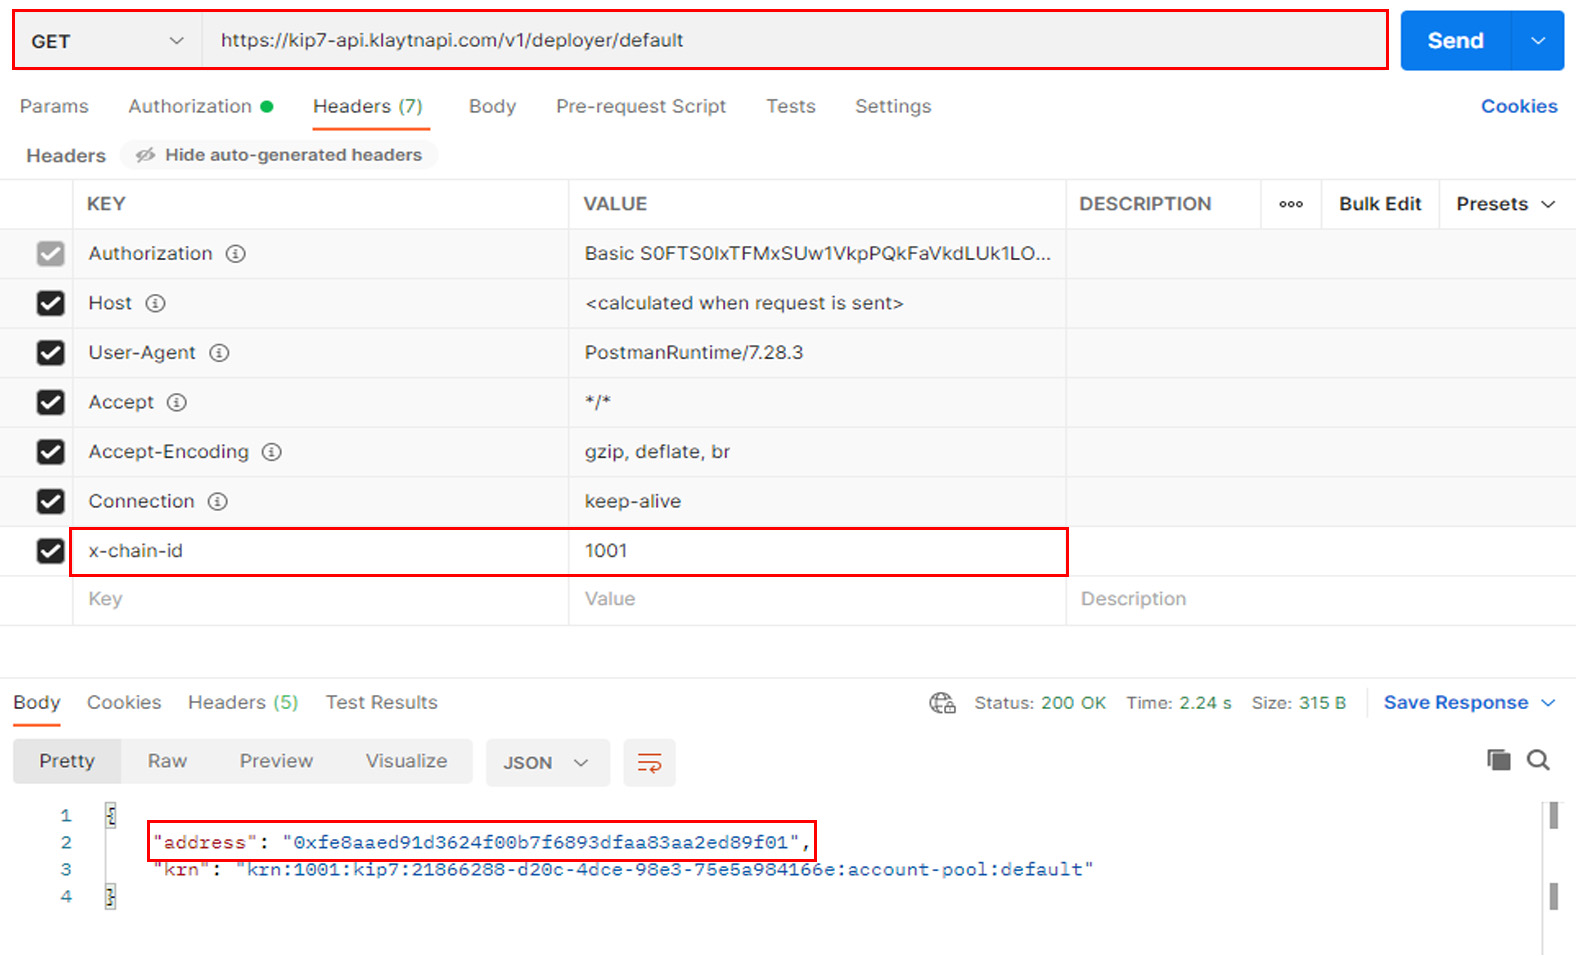
The address of the default contract deployer account that is automatically created can be checked through Get Default Contract Deployer Account API. Please refer to the instructions below to check the account address.
[For Getting a Default Contract Deployer Account]
1. Copy the URL next to Get in the KIP-7 document and paste it in your tool. Then, put x-chain-id (1001 or 8217) in Header parameters.
2. After making an API call, check your default contract deployer account address in the response.
For any additional questions, you may select Inquiry Registration above the KAS Help Center where you can register your inquiry.
Thank you.
Klaytn API Service team.